Alitu is a podcast creating and hosting platform with an intuitive interface and automatic audio processing. It does the heavy lifting for you making the editing and post-production process seem like a walk in the park or a cream puff if you will.
It polishes it automatically. You can record a clip or upload a prerecorded file and watch it refine your audio. It has automated audio leveling, podcast hosting integrations, and a free theme music library. Solo podcasters without technical editing knowledge will benefit from its intuitive settings.
How To Create A Podcast With Alitu?
Creating a podcast is as easy as it gets in Alitu. Since I am a solo podcaster, I didn’t send invites to any guests and moved ahead with creating my first episode.
Creating An Episode
The first thing you need to do is fill in your episode details. The sidebar on the left side of the dashboard displays all the options making the interface sleek and easy to navigate. Start by entering your episode details like name, number, and name of the host—that is you.
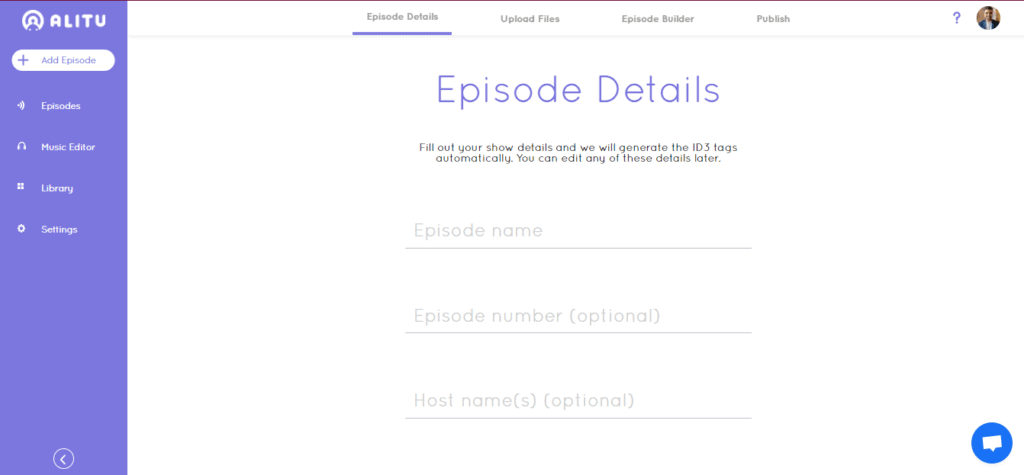
Alitu generates the ID3 tags automatically but we can edit them later. Since episode number and hostname are optional it’s okay to move on to upload the files.
If you have pre recorded audio you can upload it or record a new one with Alitu’s recorder. It’s a breeze to move from one segment to another. However, if you choose to record audio the processing takes more than 10 minutes depending on the length of the audio.
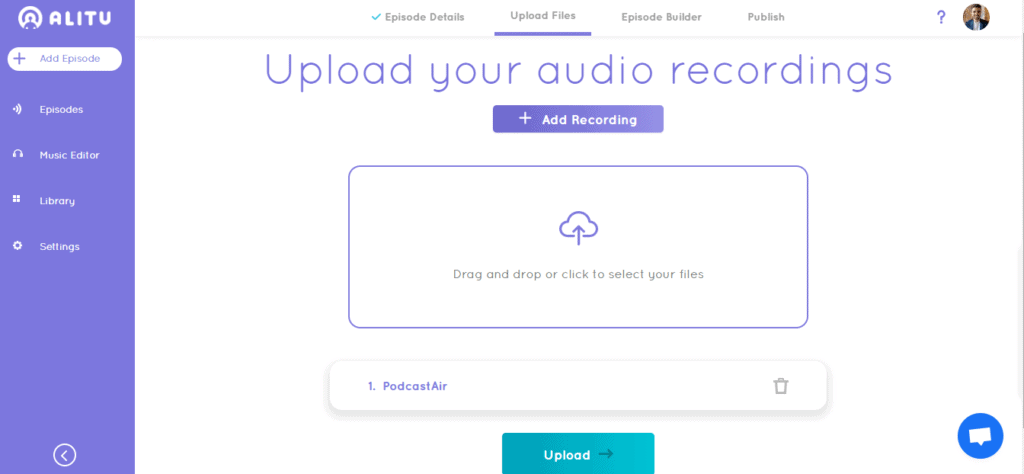
Uploading multiple files one after is another is possible by the ‘add recording’ button on top. If you’re not happy with the way your audio is processed, click on the pencil button next to it to edit the episode.
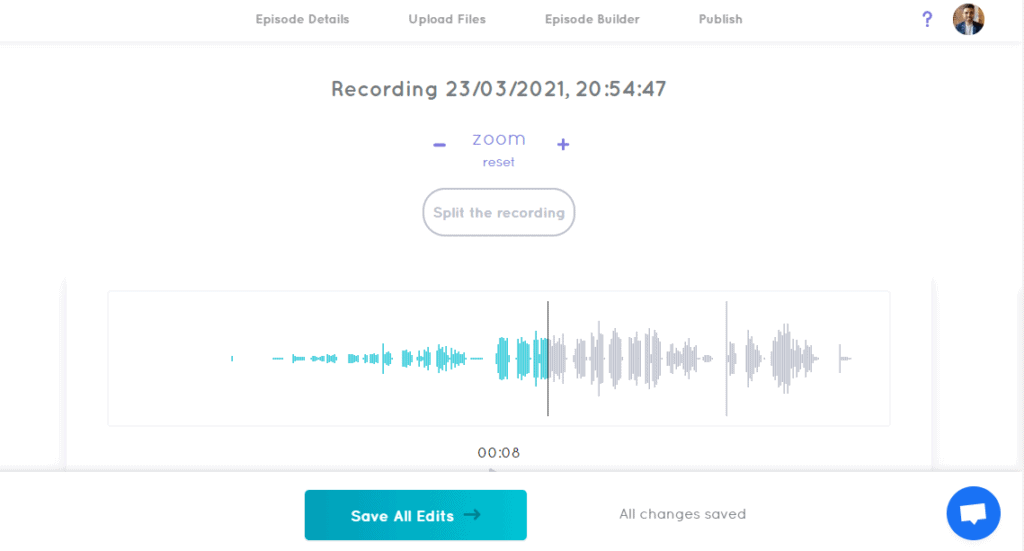
This is where I was disappointed. Though Alitu automatically reduces noise, levels the sound I still wanted more control over my audio. I could either split the audio, delete unwanted parts by selecting them, and zoom in to the frequency.
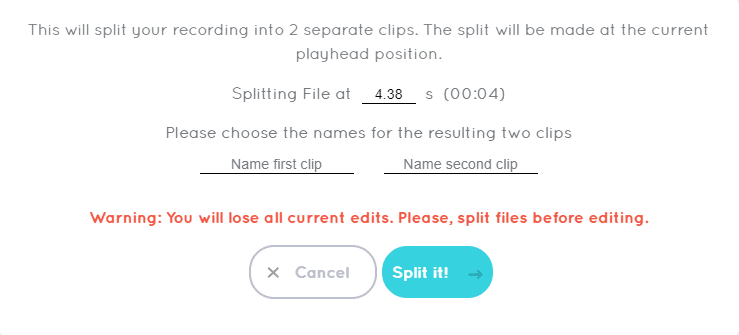
The editing options are extremely limited. You cannot generate effects, change EQ, slow down certain parts, etc. None of that is possible with Alitu’s music editor. Nevertheless, a new podcaster would appreciate all the heavy lifting done by the system.
It’s time to build your episode.
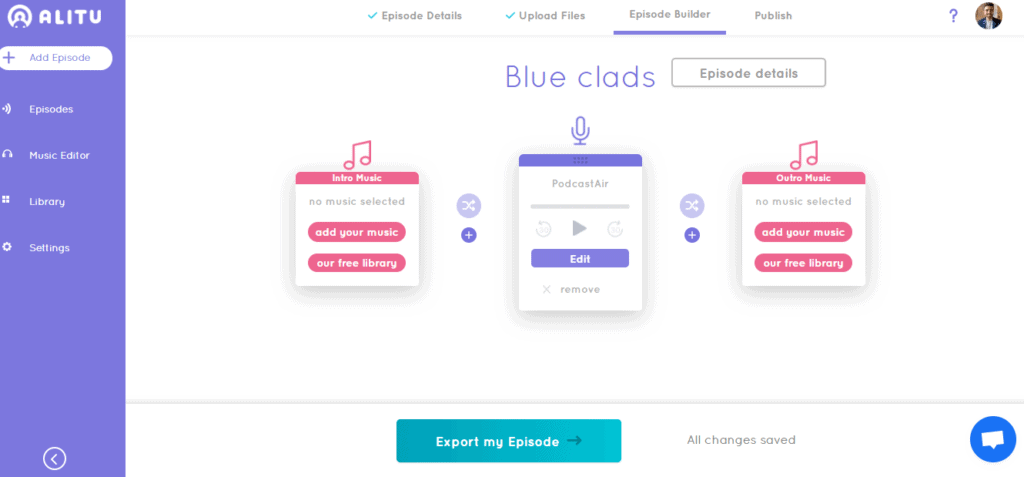
Remember when I said the interface is intuitive? Here’s where it shines more. The episode Builder section will already have an empty intro and outro section arranged appropriately. Adding music from your device or recording it is a one-click action.
Suppose you previously recorded music to add to your intro/outro section it will be available in the library.
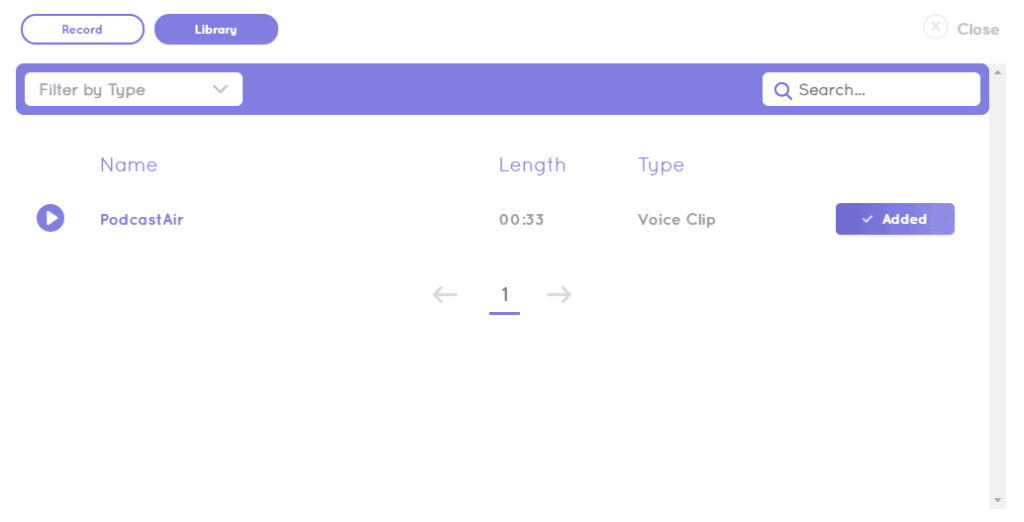
If you don’t have audio, you can choose one from their free music library consisting of multiple tracks with variations.
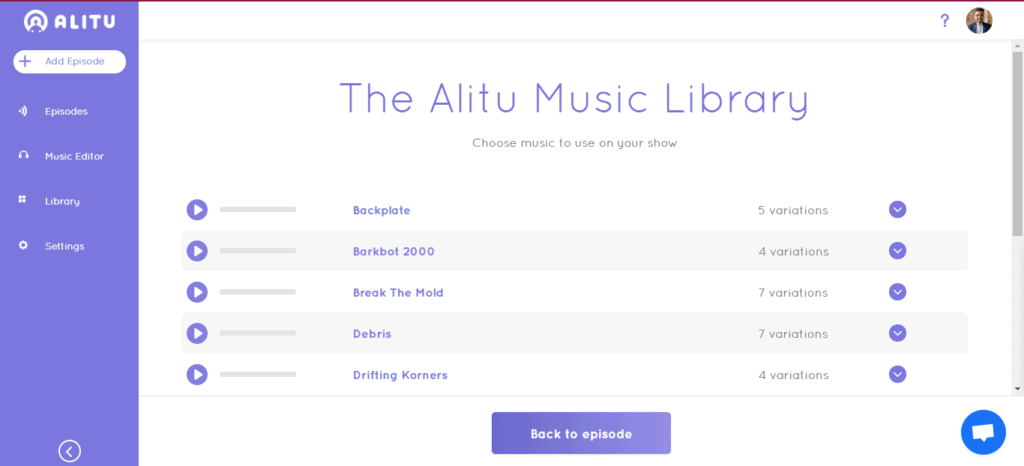
To add them to your intro/outro, select one and add it to your library. You can add more than one track to your library and upload the music from there. But what if you want to edit it? Follow the same process as above. You can add fade in the middle of each recording and also insert track or voiceover with the plus button in the middle of each section. Let’s move to publish.
Publishing And Integrations
Your finished episode will look like this when it’s ready to be published.
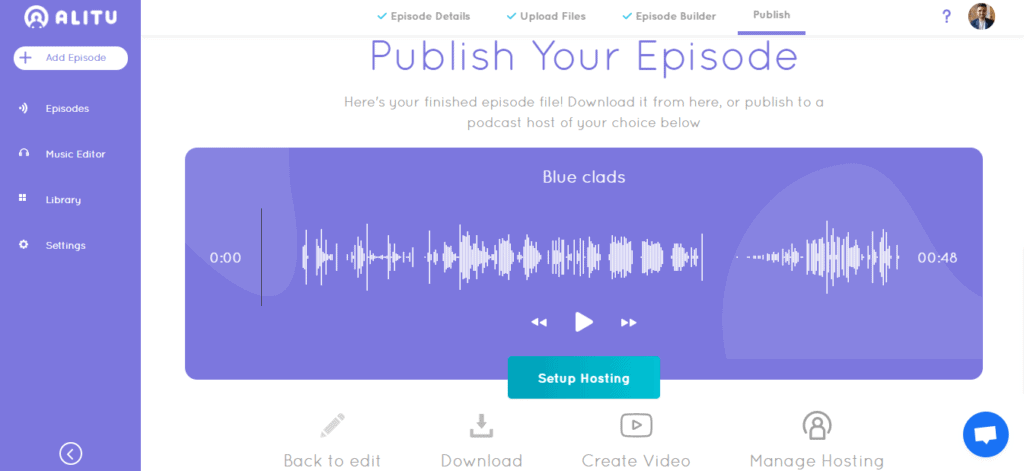
Let’s break down the options present here. To edit again, click on the pencil icon at the bottom of the screen. If you want to download your episode, click on the download button next to the pencil icon.
There’s no WAV option available so you can download your file in MP3 format only. But, here’s another cool thing Alitu offers. You can create an MP4 video (in WAV) of your podcast recording and share it on your social media platforms.
Alitu integrates with 6 podcast hosting platforms:
- Buzzsprout
- Libsyn
- Bluebrry
- Spreaker
- Podbean
- Captivate
There are two ways to publish your podcast: Click on Manage Hosting or Setup Hosting. You can easily set up host integration and link to your existing podcast service for quick publishing in the future.
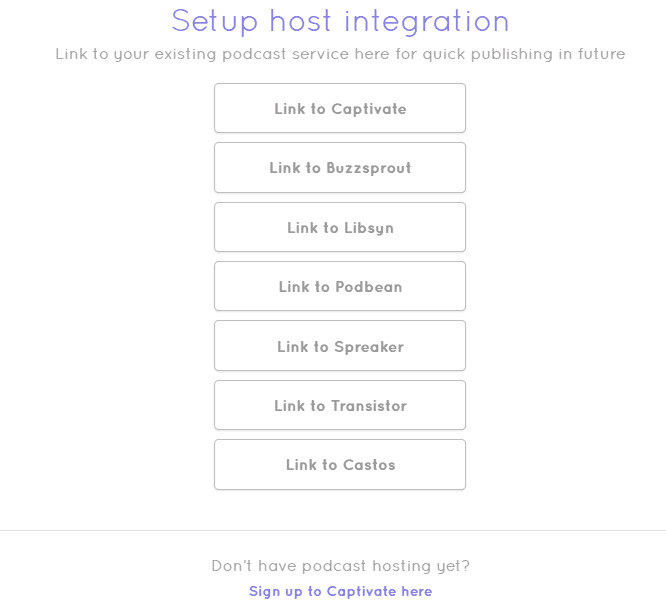
Let’s say you already have an account on Buzzsprout and want to link your podcast to it. How would you do that?
Linking To Buzzsprout
To link your podcast to Buzzsprout.
- Select Buzzsprout from integrations.
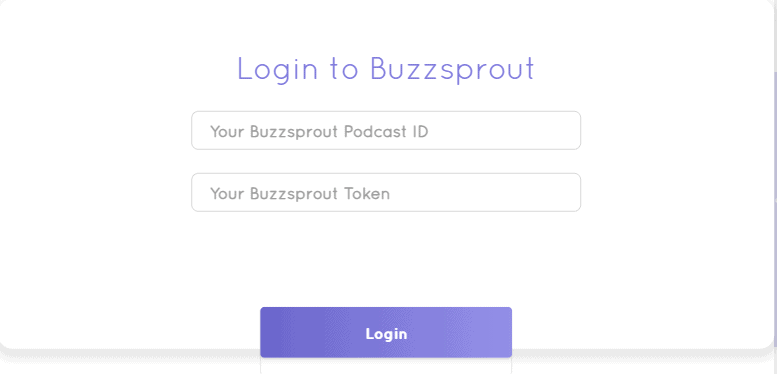
- Add your podcast ID and Token.
If you don’t remember the details. Just log in to your Buzzsprout account. Go to your profile and select API to view your credentials. Here’s what it looks like.
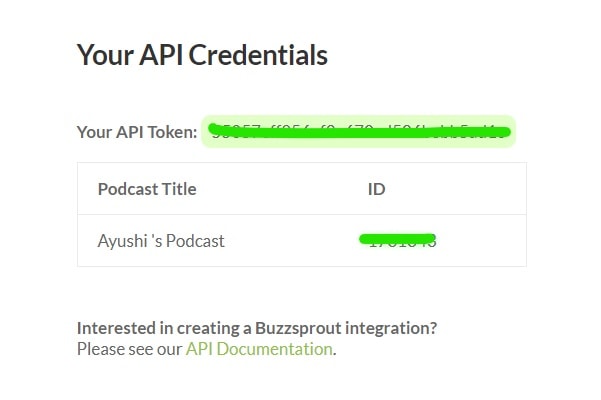
Now all you need to do is fill in these details in your Alitu dialog box and click on log in. And it’s done. You’ve successfully linked your podcast to Buzzsprout. Now to the most important aspect: how much does it cost to make your podcast with Alitu?
Pricing
There are two pricing plans and both of them are relatively affordable. Alitu has a 7-day free trial. To sign up for it you need to provide your credit card details. Much like with other software, you can cancel your subscription anytime before the trial ends.
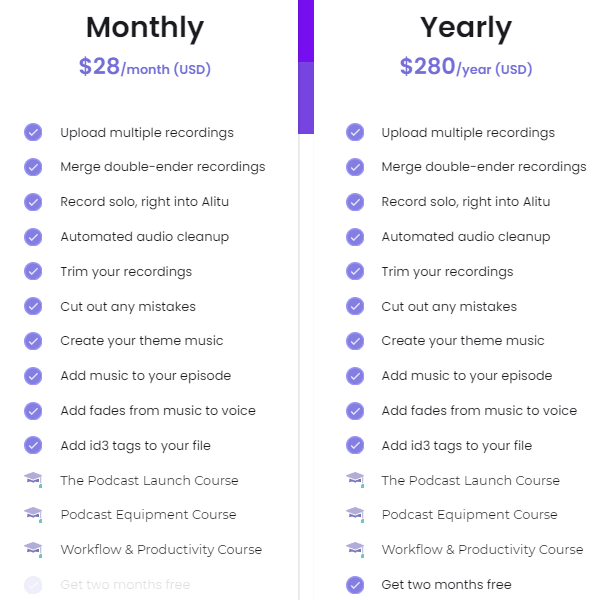
Monthly Plan: $28/month.
Yearly Plan: $280/ year.
The only difference between the monthly and yearly plan is the two-month free access. If you buy the yearly plan at $280/year, you will get two months of free service. Alitu offers three courses to help you create exceptional podcasts. However, they aren’t available in the 7-day free trial.
Final Thoughts
Alitu is well suited for beginners looking for easy and quick solutions to create, edit and publish podcasts. Let’s quickly go over the pros and cons of this podcast maker.
Pros:
- Intuitive interface and automated settings.
- Free music library with theme tracks available in variations.
- Allows in-app recording.
- Integrates with popular podcast hosting services like Buzzsprout, Captivate, etc.
- Affordable
Cons:
- Editing is automated and leaves little to no authority and flexibility over audio quality and settings.
- It has only one transition effect and lacks advanced features offered by software like Adobe Audition, Audacity, Hindenburg Journalist, etc.
- Limited audio recording and available for download only in MP3 format.

